Cloud Integration
Cloud integration refers to your backend server interacting with SUNBAY payment platform through Nexus API, including initiating payment requests to payment terminals, querying transaction status, executing management operations, etc. Suitable for businesses that need centralized transaction management and support multi-terminal scenarios.
Solution Description: For transaction flow of cloud integration, please refer to Solution Overview.
Integration Methods
Choose one of the following integration methods based on your technology stack and requirements:
Method 1: Server-side SDK (Recommended)
Using SUNBAY server-side SDK is the most recommended cloud integration method. SDK encapsulates complex logic such as authentication, message assembly, HTTP connection management, etc.
Advantages:
- Out-of-the-box, integration can be completed with just a few lines of code
- Automatically handles API authentication and request headers
- Input and output parameters are modeled, type-safe
- Automatically handles message assembly and parsing
- Built-in HTTP connection management and retry mechanism
- Follows API updates, maintains compatibility
Supported Languages:
- Java
- Python
- Node.js
- PHP
- Go
- .NET
Method 2: Direct API Calls
If your technology stack does not support the SDKs we provide, you can directly call Nexus API.
Applicable Scenarios:
- Programming languages not supported by SDK
- Need complete control over request process
- Special business requirements
Note: Direct API calls require handling authentication, message assembly, HTTP connection management and other logic yourself, with higher development difficulty. It is recommended to prioritize using SDK.
Start Development
1. Install and Configure Tapro Application
Before starting integration, ensure that the payment terminal has Tapro application installed and Taplink Configuration completed.
Steps:
- Install Tapro application on the payment terminal
- Open Tapro application and enter settings page
- Enable Taplink Configuration switch
- Select connection mode as CLOUD (Cloud mode)
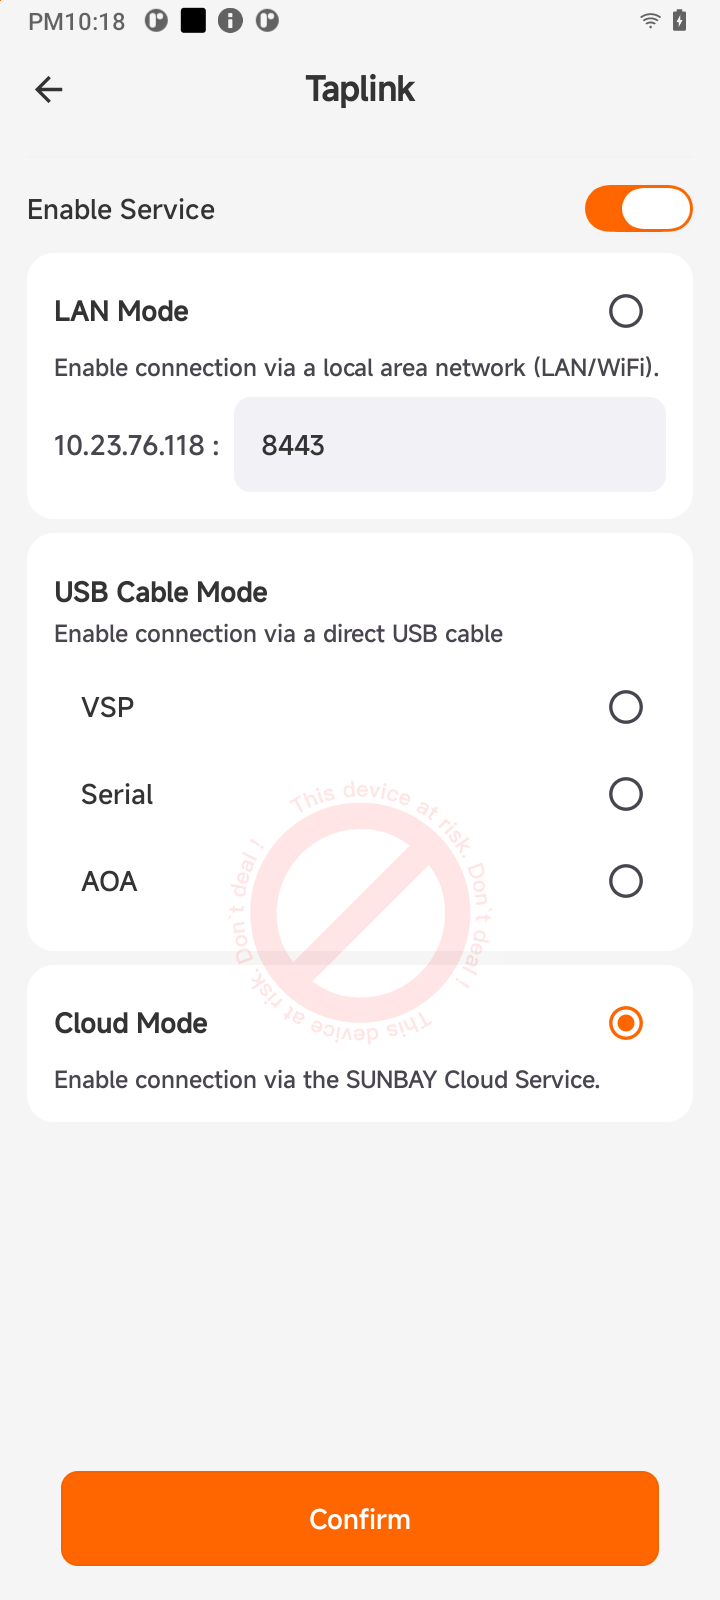
Cloud Mode Description:
- Terminal connects to SUNBAY cloud platform via internet
- Your server sends payment requests to cloud platform via Nexus API
- Cloud platform pushes payment commands to terminal for execution
- Suitable for SaaS platforms, chain stores and other scenarios requiring centralized management
2. Obtain Development Credentials
Before starting integration, you need to obtain necessary development credentials first. For detailed steps, please refer to Pre-Development Preparation Documentation.
Brief process:
- Contact SUNBAY to obtain Copilot account
- Log in to Copilot portal to create payment application (select “Cloud Deployment” mode)
- Obtain application credentials (including sandbox and production environments):
- App ID: Application unique identifier
- API Key: API access key
- Webhook Secret: Key for verifying Webhook signatures
3. Choose SDK or API
Choose appropriate integration method based on your technology stack:
Using SDK: Visit Server-side SDK Documentation to select SDK for corresponding language
Direct API Calls: Refer to API Reference Documentation to understand API details
4. Configure Permissions
Apply for required API permissions for your application in Copilot portal. Each API corresponds to one permission, permission identifier is the API path.
Common API Permissions:
| API Function | API Path (Permission Identifier) | Description |
|---|---|---|
| Sale | /v1/semi-integration/transaction/sale | Sale transaction |
| Pre-authorization | /v1/semi-integration/transaction/auth | Pre-authorization |
| Pre-authorization Completion | /v1/semi-integration/transaction/post-auth | Pre-authorization completion |
| Forced Pre-authorization | /v1/semi-integration/transaction/forced-auth | Forced pre-authorization |
| Incremental Pre-authorization | /v1/semi-integration/transaction/incremental-auth | Incremental pre-authorization |
| Refund | /v1/semi-integration/transaction/refund | Refund transaction |
| Void | /v1/semi-integration/transaction/void | Void transaction |
| Tip Adjustment | /v1/semi-integration/transaction/tip-adjust | Tip adjustment |
| Abort Transaction | /v1/semi-integration/transaction/abort | Abort transaction |
| Transaction Query | /v1/semi-integration/query | Query transaction status |
| Batch Close | /v1/semi-integration/settlement/batch-close | Batch close |
| Batch Query | /v1/semi-integration/settlement/batch-query | Batch query |
For complete API list, please refer to API Reference Documentation.
Important: Some APIs require completing sandbox environment test acceptance to obtain production environment usage permission. For detailed process, please refer to Sandbox Environment Testing Documentation.